Revit Join Gutter
Revitcity Com Connecting Gutters

Revitcity Com Annoying Gutter Join

Gutters With Slope Autodesk Community

Gutter End Caps In Revit Architecture Youtube
Solved Model Roof Gutter Autodesk Community Revit Products

Autodesk Revit Tutorials 13 Adding An Entry Deck Revit Tutorial Autodesk Revit Tutorial
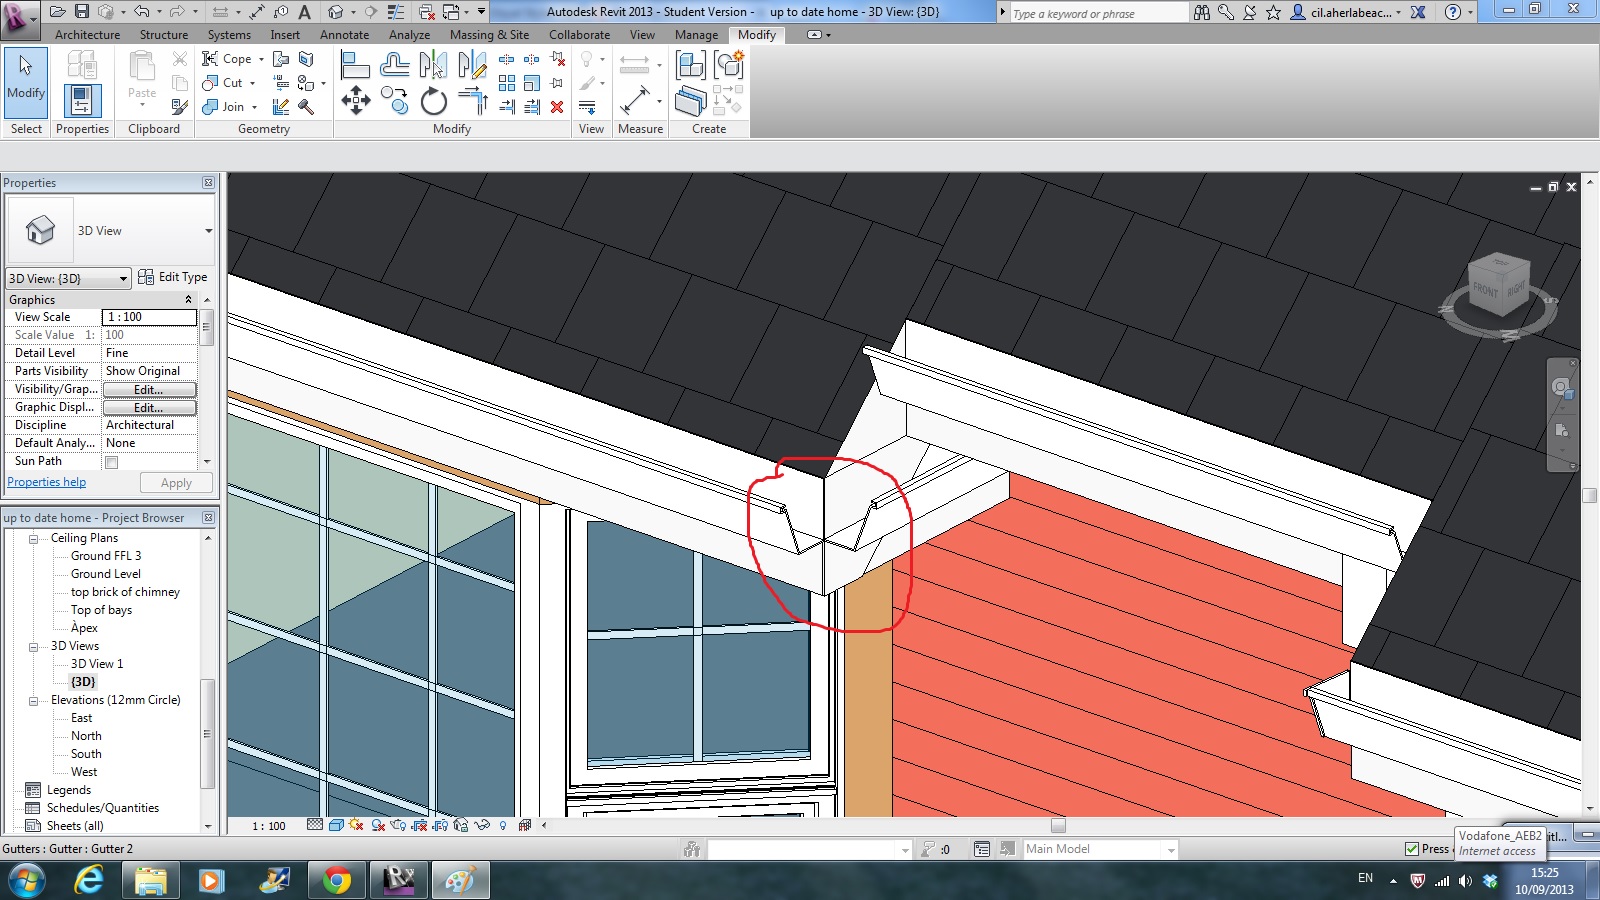
Now if you re choosing a fascia sweep as the edge to host your gutters and the fascias don t exactly trim together at a corner then the gutter won t either and you ll have to manually pull the ends of the gutter together to miter the corners.
Revit join gutter.

Revit Tips Spanish Roof Adaptive Insane Version With Images Revit Tutorial Roof Revit Architecture

Autodesk Revit Tips And Tricks From Rhino To Revit Autodesk Revit Learn Revit Education Design Interior

Pin On Roofing

Energy Efficient Revit Construction Details Energy Efficient Construction Detailed Drawings Architecture Details

Revit Family Academy Generic Model Line Based Revit Family Autodesk Revit Generic

Roof Flat Roof Revit Tutorial Architecture Program Roof Design

Autodesk Revit Architecture 2014 Tutorial Basic Wall Revit Architecture Autodesk Revit Revit Tutorial

Profile Families For Fascias In Autodesk Revit Youtube

Revit Families Series Custom Gutter Profile A How To Guide Youtube

Creating Pattern In Revit Patrones

Topography Kite Tutorials Is Educational Channel In Urdu Language Revit Architecture Revit Tutorial Architecture

Dryseal Grp Through Wall Hopper Roof Installation Fibreglass Flat Roof Flat Roof

Revit 2d Details Part 1 Introduction

Schedules Basics Tips Building Information Modeling Revit Tutorial Basic

Smart Flat Roofs The Craft Of Parapet Detailing Build Blog Flat Roof Membrane Roof Parapet

How The Soffit Fascia Should Be Google Search Image Framing Construction Home Construction Home Maintenance
Video Create A Dormer Revit Products 2019 Autodesk Knowledge Network

Renzo Piano Kimbell Art Museum Floor Plan Ando Architecture Tadao Pinned By Www Modlar Com Construcao Construcao Civil
Https Encrypted Tbn0 Gstatic Com Images Q Tbn 3aand9gcqor2isbxwlbhwpl3uftobkksbmzfomx Aabdptf0 9yvkdig2p Usqp Cau

Bim After Dark Ultimate Gallery Therevitkid Com Tutorials Tips Products And Information On All Things Rev Bim Revit Architecture Architectural Thesis

Zintek Gutter Detail Flat Roof Design Zinc Roof Roof Design

In This Revit Video Tutorial One Can Learn How To Use Revit Architecture 2018 To Generate Stair Through B Revit Architecture Architecture Program Architecture

Revit 2018 Soffit And Fascia Tutorial Youtube
Revit Tutorials Custom Wall Parapet Youtube
Source : pinterest.com
