Revit Break Roof
Split Roof In Revit Paul F Aubin

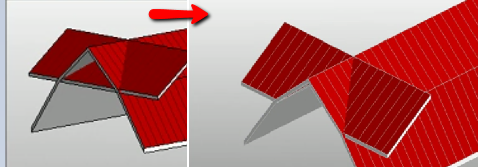
How To Break Revit Roof Slope To Straight Autodesk Community Revit Products

Revit Roof Basics 04 Intersect By Roof Join Cadclips Youtube
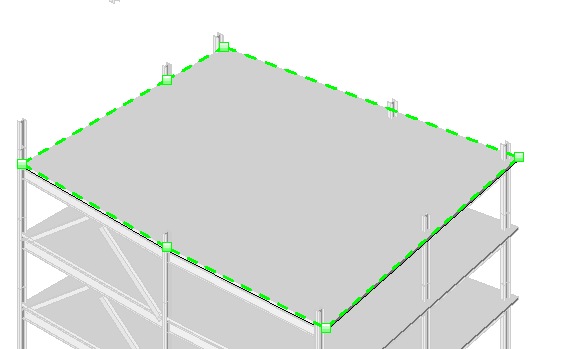
Split A Roof Or Structural Floor Revit Products 2018 Autodesk Knowledge Network
Inside The Factory Architecture
Video Shape Editing Roof And Floor Slabs Revit Products 2018 Autodesk Knowledge Network

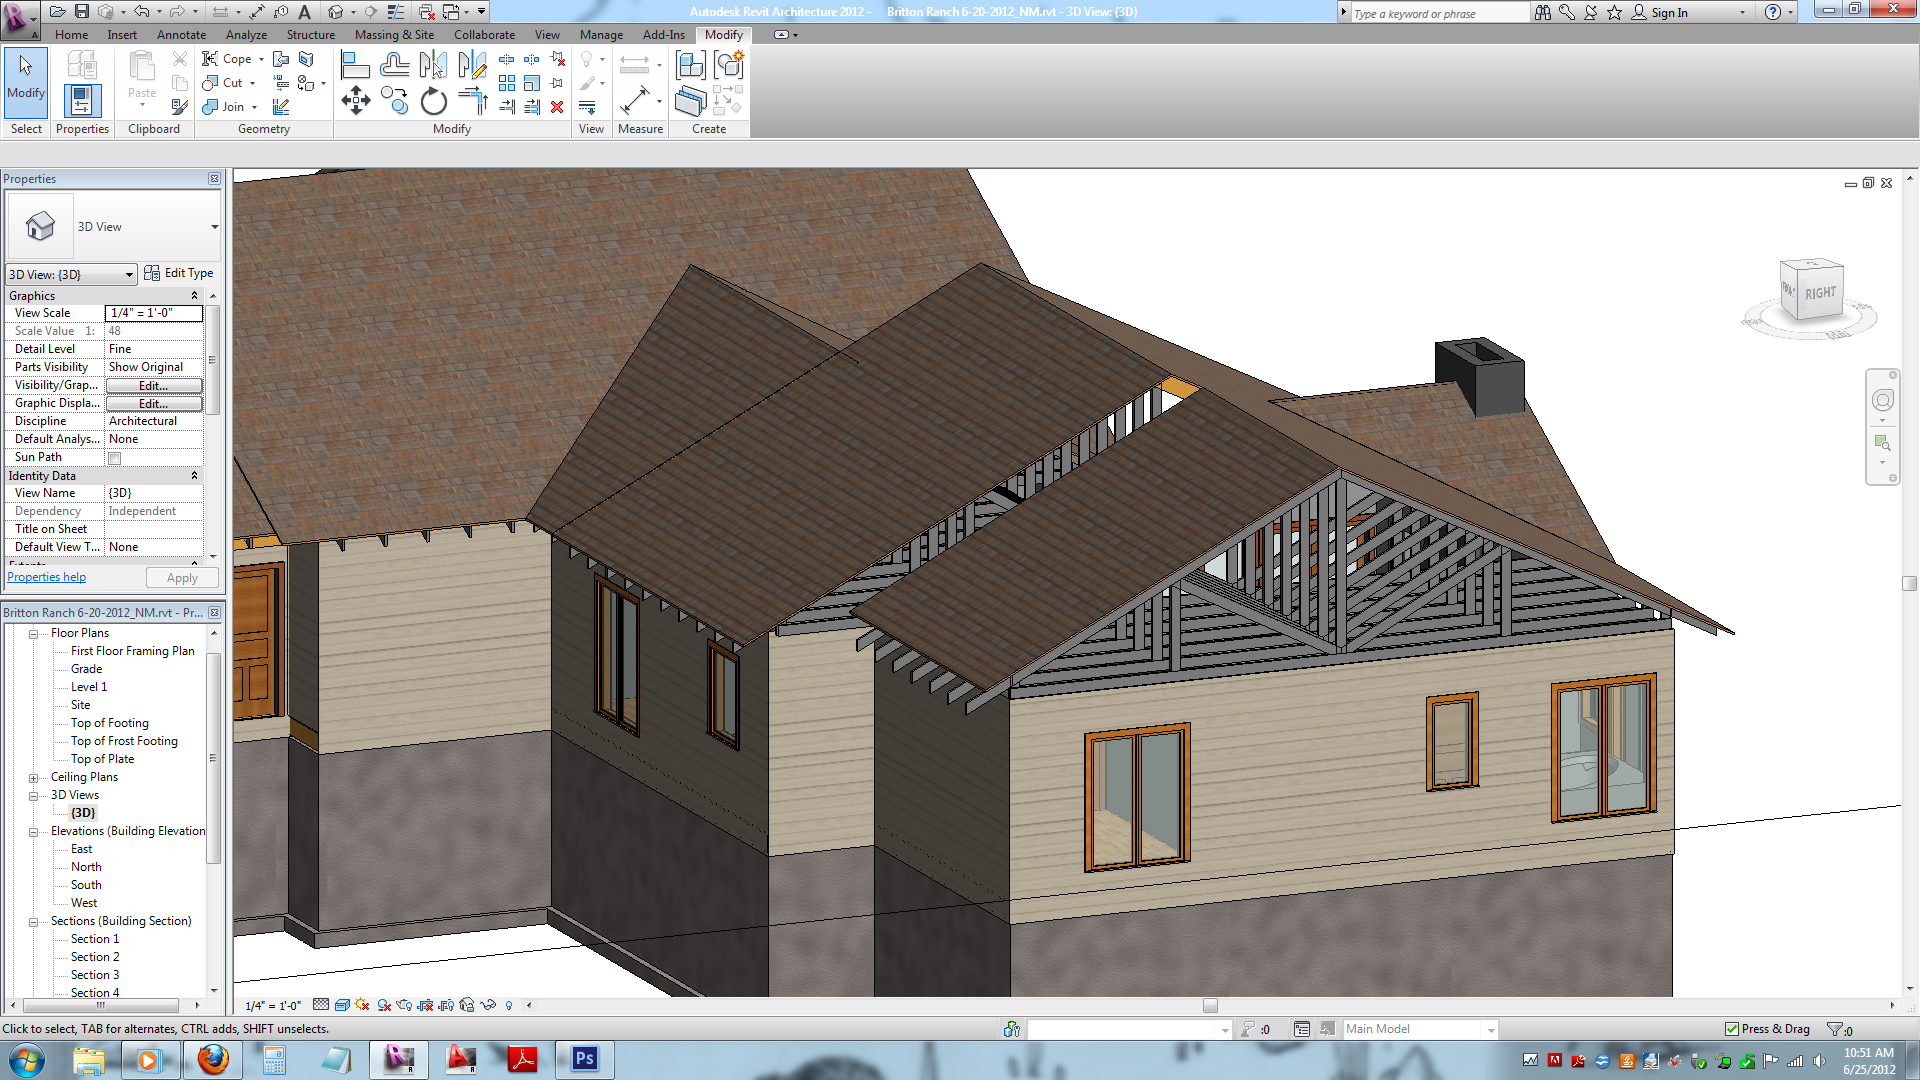
9 join roofs add opening to create dormer.
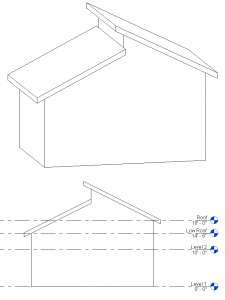
Revit break roof.
About Editing Floor And Roof Shape Revit Products 2019 Autodesk Knowledge Network

Solved Build A Roof With 2 Slopes And Wall Higher On One Side Autodesk Community Revit Products
How To Cut A Hole To A Roof Revit Lt 2018 Autodesk Knowledge Network
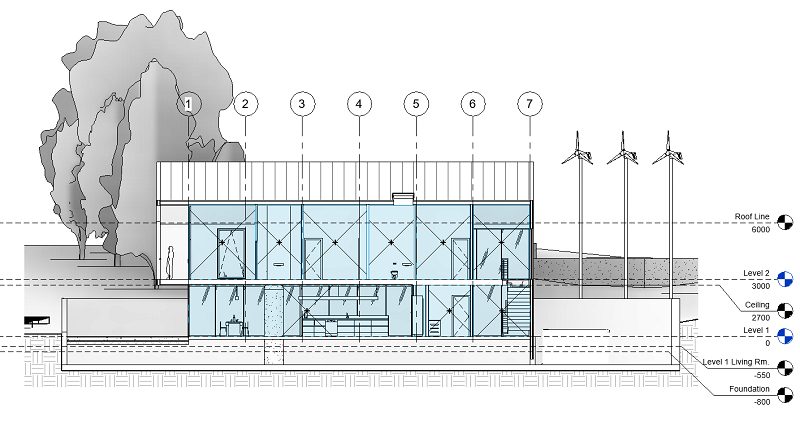
Revit Split Sections Mark Calloway

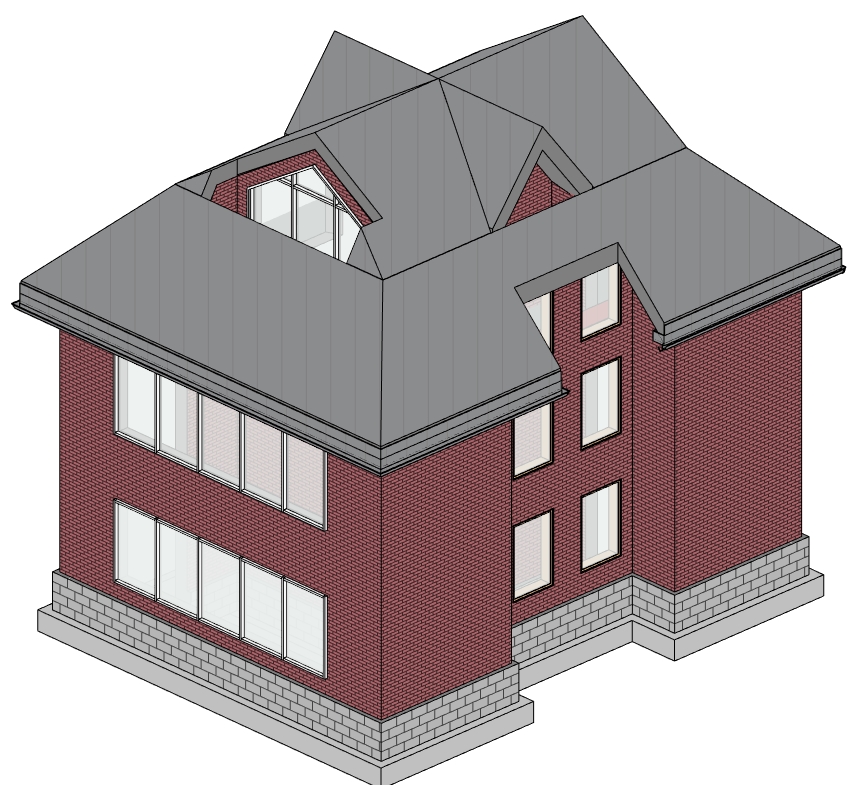
10 Common Roof Shapes Modeld In Revit Tutorial Revit Tutorial Roof Shapes Revit Architecture

Solved Roof Errors Autodesk Community Revit Products
Creating Complex Roof In Revit Cadnotes

Solved How To Create Metal Corrugated Wall And Roof In Revit Architecture Autodesk Community Revit Products
Inside The Factory Shape Editing

Https Encrypted Tbn0 Gstatic Com Images Q Tbn 3aand9gcsypmpackojihknncgufnonxuep0e5w Gu 8a Usqp Cau

Roofs In Revit 8020 Bim
Revitcity Com Revit Roof Issue
Common Types Of Roofs How To Model Them In Autodesk Revit Agacad

Arraying Roof Shades Revit 2016 Free Tutorial Black Spectacles

Arraying Roof Shades Custom Families And Parameters In Revit 2016 Black Spectacles Youtube

Foundation Detail Callout In Revit Tutorial Youtube

10 1 18 Visionrez 2019 Editing Tools For Revit Roof S Youtube

Mwf Homebuilder Suite Intro In Revit Building Information Modeling Revit Tutorial Revit Architecture
Https Encrypted Tbn0 Gstatic Com Images Q Tbn 3aand9gcqt Jag1pa Hofhz 59fqg8i0feamtfelr0xlmsrdq6chiqvxbg Usqp Cau

Solved Steel Connections Autodesk Community Revit Products

Create A Roof Slope Using Slope Arrows Revit Lt 2019 Autodesk Knowledge Network

Revit 101 Roof By Extrusion Constructing Architect

Create Roof Fascias Soffits Gutters And Downpipes In Revit 8020 Bim

Create Roof Trusses With Purlins In Revit Roof Trusses Roof Truss Design Roof
Source : pinterest.com
