Revit Attach Beams To Inside Of Roof

Revit Tips Creating Rafters With Beam System Youtube

Solved Roof Structure Autodesk Community Revit Products
Constraining A Beam System To A Roof Or Floor The Revit Clinic

Youtube Detail Callout Revit Tutorial Building Information Modeling Roof Architecture

Revit Attach A Beam To A Curved Roof Youtube

Revit Tutorial Angled Arched Beams Youtube

Tile this view with the plan view at the level of the beam system.
Revit attach beams to inside of roof.
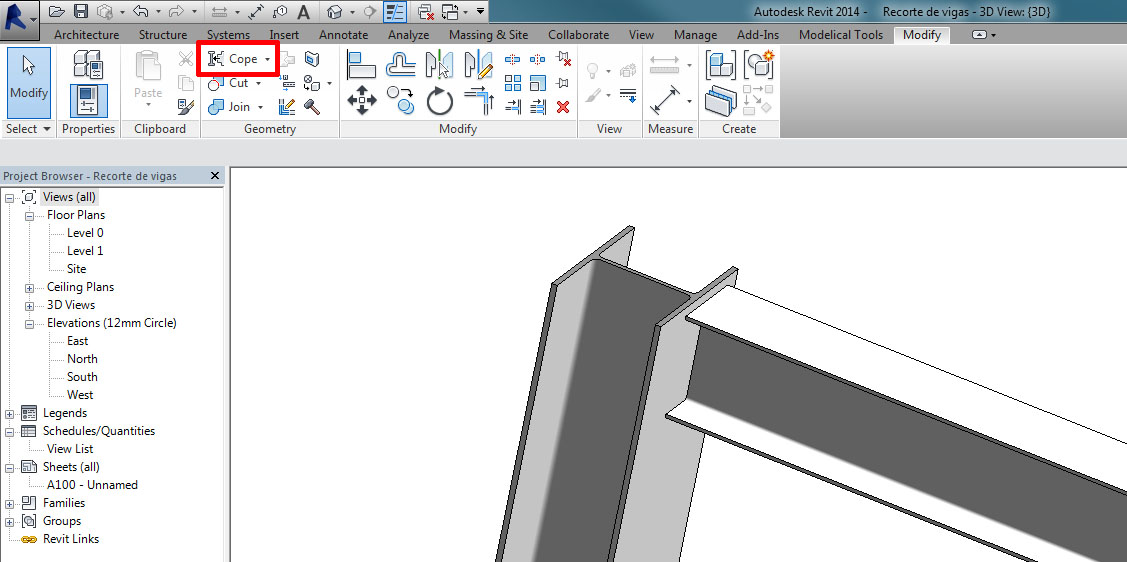
Cut Beams And Columns In Revit Modelical

How To Make A Beam System In Revit Youtube

Solved Creating Beams On A Slope Autodesk Community Revit Products

Structural Detailing Roof Beam Faux Beams Autodesk Revit

A Residential Guide To Spray Foam Insulation Build Blog Foam Insulation Spray Foam Insulation Foam Roofing
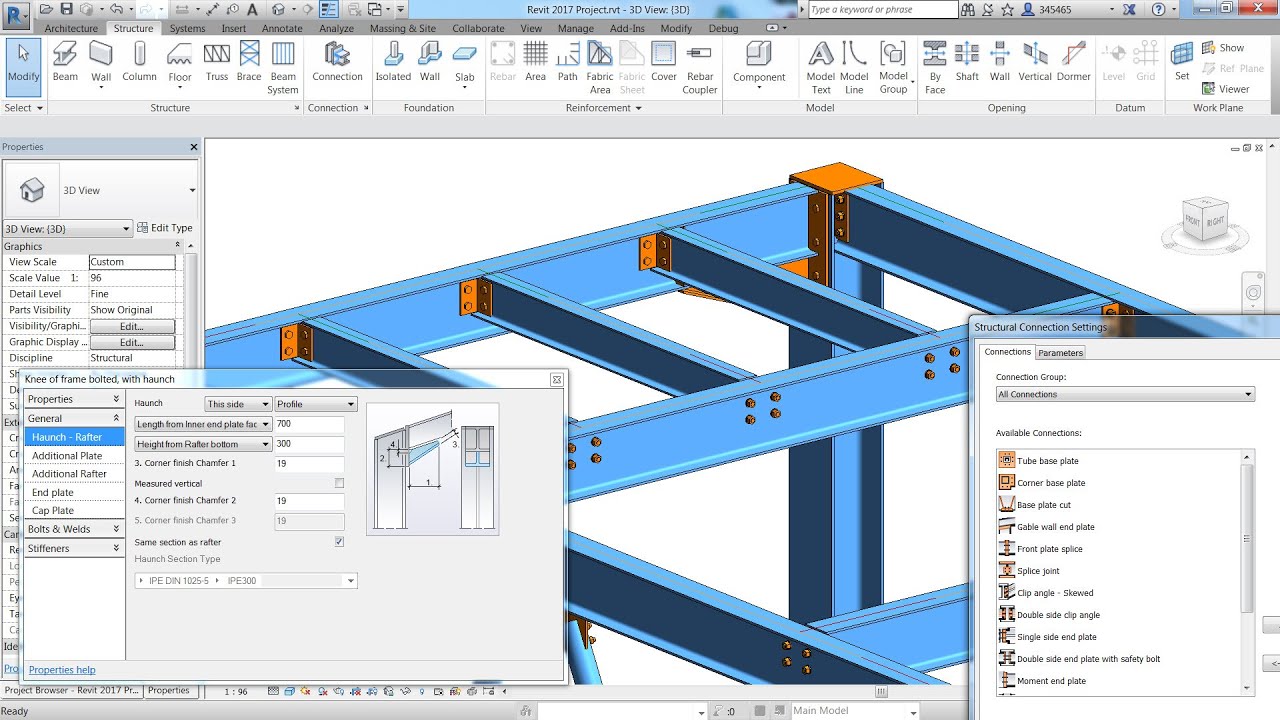
Structural Steel Connections In Revit 2017 And Advance Steel 2017 Youtube

Parametric Timber Connections For Revit Timber Frame Joinery Steel Columns Timber Posts

Beam To Circular Chs Moment Connection Detail Steel Beams Steel Columns Beams

Creating Rafter Style Framing

About Editing Floor And Roof Shape Revit Products Autodesk Knowledge Network

Revit Tool To Extract Selected Families Outside Revit Model In 2020 Revit Architecture Architecture Details Revit Family

Construction Steel Pergola Pergola Building A Pergola

Glulam Beams For Exterior Use In 2020 Wood Beams Timber Beams Beams

I Make Video Tutorials On Revit Archtecture My Website Https Www Cadneeds Com My Youtube C In 2020 Revit Architecture Revit Tutorial Building Information Modeling

Purlins On Curved Roof Youtube

Pilot 4 Grand Foyer Metal Chandelier Beams

False Rafter Tails Give The Impression Of A Timber Framed Roof Structure First The Tails Were Attached To The Frieze Bo Roof Detail Metal Roof Roof Sheathing
Designed Using Revit Software By Autodesk Cottage House Plans House Plans Floor Plans
Https Encrypted Tbn0 Gstatic Com Images Q Tbn 3aand9gcqknfzldk13 U8ghl8ath0mldwdplaygyysac4efhebuj80etsq Usqp Cau

Staleva Balka Do Betonnoyi Stini Zv Yazku Steel Beams Steel Frame Construction Steel Columns

Traditional Waterproofing Plane Concrete Roof Google Search Parapet Roof Cement Roof

Pin On Staal

7 Amazing Tips Green Roofing Cottage Roofing Colors For White House Roofing Garden Pergola Simple Roofing Structure R Cavity Wall Masonry Construction Roofing

Revit For Mep Electrical Lighting Systems Circuits Switches And Annotation Lighting System Architecture Presentation Switches
Source : pinterest.com
