Revit Adjust View To See Roof
Roof View Range Autodesk Community Revit Products

Revit Tips Spanish Roof Adaptive Insane Version Revit Tutorial Autocad Revit Revit Architecture

Pin Ot Polzovatelya Lentigginka Na Doske Revit V 2020 G

Revit Tutorials How To Orient To Revit True North Vs Revit Project North Youtube Revit Tutorial Building Information Modeling Autodesk Revit

Pin On Revit Renderizacao Iluminacao Luminarias Texturas

Drawing A Dormer In Revit Dormers Drawings Future House

Select the desired linetype from the line style type selector.
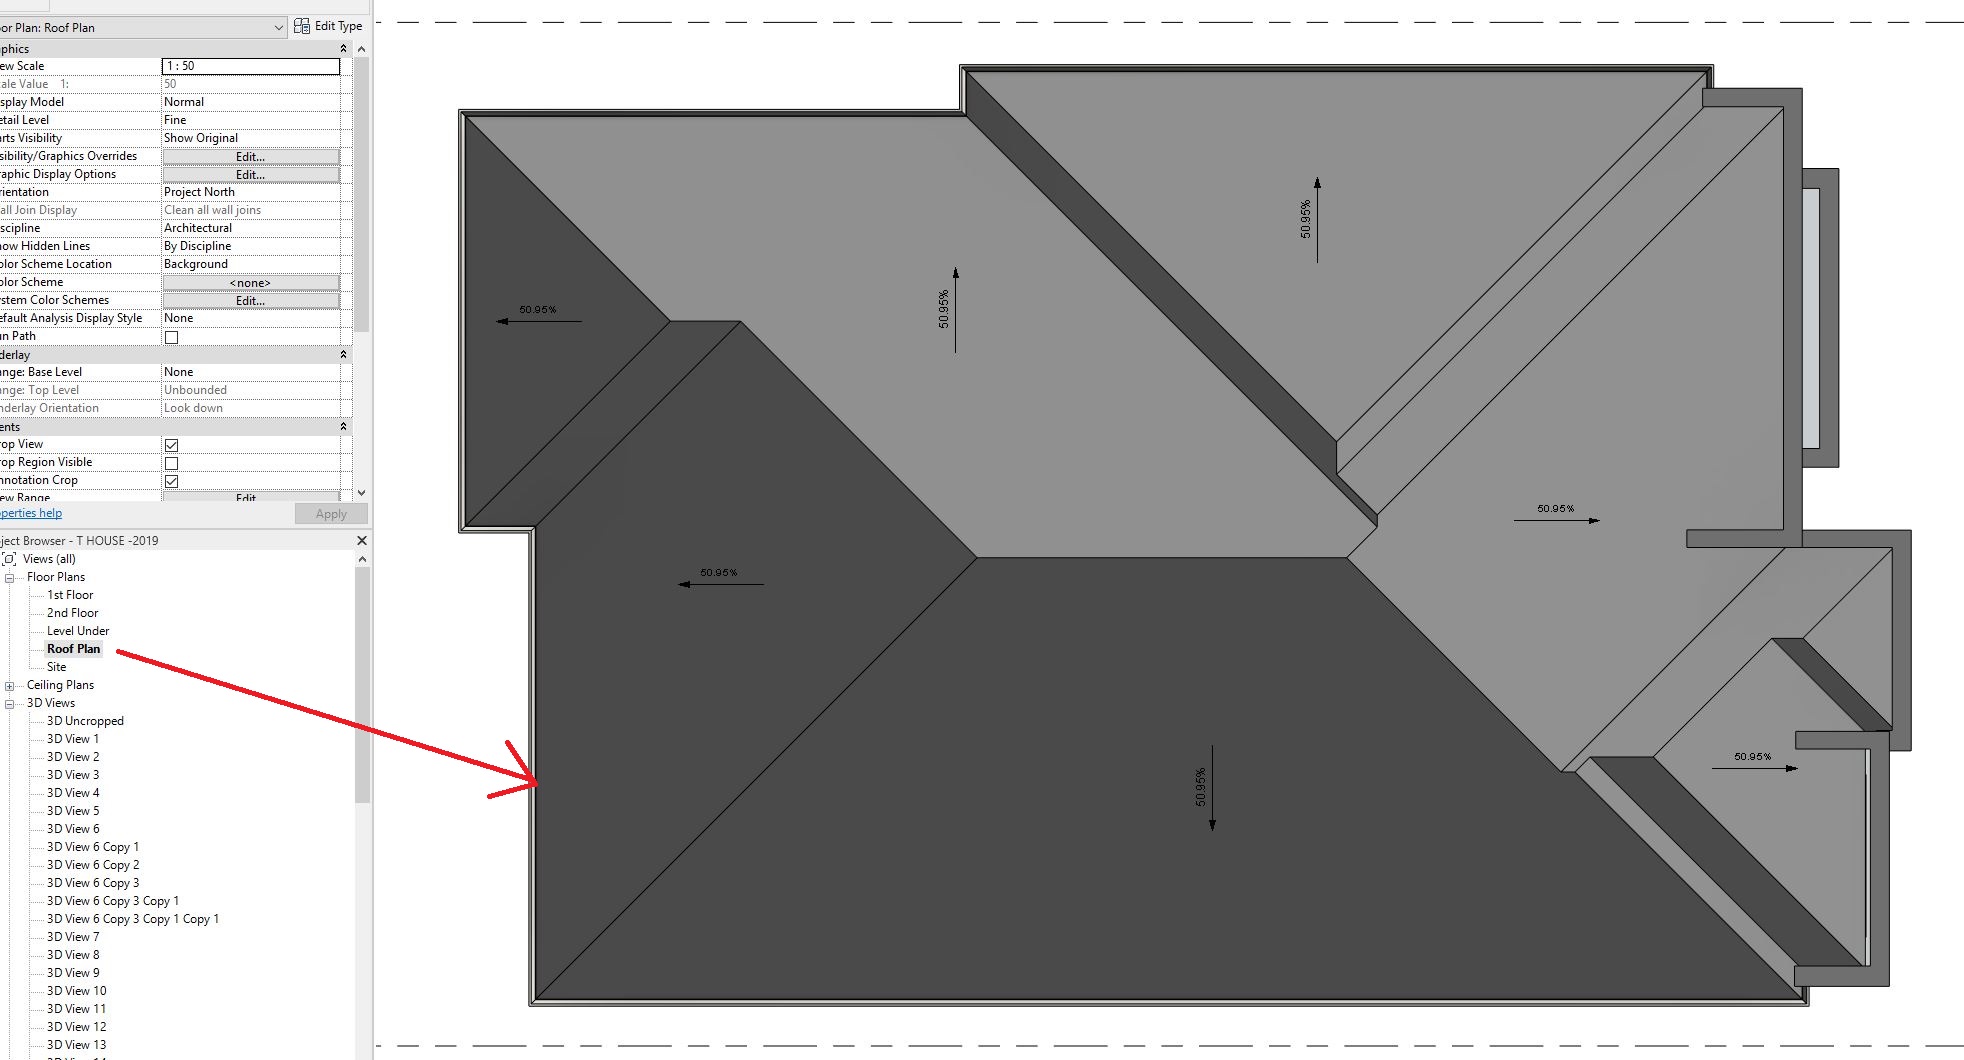
Revit adjust view to see roof.

Solved Roof Plan Questions Autodesk Community Revit Products

Windows 8 Themes Free Download By Princehackers Autodesk Revit Revit Architecture Autodesk

Modeling A Tensile Fabric Roof In Revit Building Information Modeling Revit Architecture Architecture Program

Dome Roof Using Revit Dome Roof Abstract Artwork

Autodesk Revit Tutorials 09 Adding Windows Revit Tutorial Autodesk Revit Tutorial

There Are Different Methods In Revit For Creating Roofs The Easiest One Is The Footprint Roof A Footpri Building Information Modeling Revit Architecture Roof

16 Capital Glass Roofing Lobby Ideas Roof Repair Roof Architecture Revit Tutorial

How To Manually Highlight Rows Within A Revit Schedule With Colour Micrographics Schedule The Row Highlights

Revit Roof Basics 04 Intersect By Roof Join Cadclips Youtube

Placing Face Based Families In Revit Projects Projects Base Face

Youtube View Projection Modes Revit Architecture Revit Tutorial Architectural Section

Adjusting Topography To Floors In Revit Tutorial Youtube Revit Tutorial Architecture Architecture Presentation Revit Architecture

Different Roof Types In Revit I Done In Revit Shed Roof Dome Type Roof Galvanized Roof Basic Roof Cool Roof Shed Roof Galvanized Roofing

Roof Cutoff Level Youtube

Revit Sheet List In Schedule View Sheet List Best Practice
Video Shape Editing Roof And Floor Slabs Revit Products 2019 Autodesk Knowledge Network

Solved Roof Overhang Option Not Available For Some Roofs Autodesk Community Revit Products

Revit Architecture 2014 Section Perspective Blog Cadline Community Revit Architecture Architectural Section Architecture Photography Buildings
Https Encrypted Tbn0 Gstatic Com Images Q Tbn 3aand9gcthtxl9m6xwcsjfuce78cqleefrg2hhoxvgrhgse6wofvqqeqjc Usqp Cau
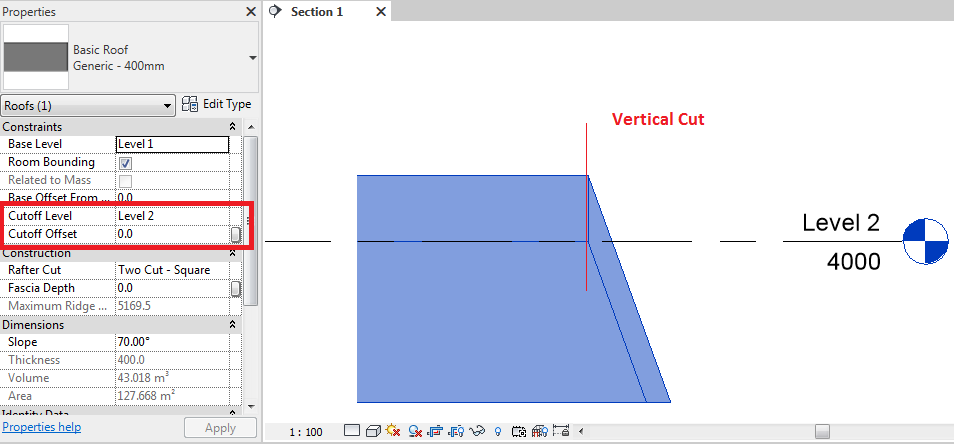
Cutoff Level Roof Behavior In Revit Revit Products 2018 Autodesk Knowledge Network

Revit Roof Basics 10 Slope Arrow Cadclips Youtube

Pin By Simon Hayes On Revit In 2020 Revit Tutorial Roof Architecture Building Information Modeling
Video Create Views Of Your Model Revit Products 2020 Autodesk Knowledge Network

Revit Component Stairs Tips And Tricks Cadtechseminars Com Revit Components Autodesk Revit Tips
Source : pinterest.com
